5.15.2009

HOW TO MAKE CORN FLAKE CLUSTERS


Corn flakes - 4 cups

Sugar - 2 cups

Karo syrup - 2 cups

Peanut butter - 2 cups


Start the stove eye on low, then add the 2 cups of sugar and 2 cups of Karo syrup. The consistency will be very thick and cloudy. Keep stirring and gradually turn up the heat. The mixture will soon thin out and began to bubble (or boil). At the first signs of boiling, take the pot off the heat.


After the pot is off the heat, add the 2 cups of peanut butter.


Stir in peanut butter until it has melted.


Now gradually add in the corn flakes, one cup at a time. To be honest, we add the corn flakes until we get the right consistency. There has to be an even amount of corn flakes versus peanut butter. If there is too much peanut butter and not enough cornflakes, you may have to use a spoon to eat it:) If there are too many corn flakes and not enough peanut butter, they may be a little dry:) Whatever works for you!


After the corn flakes are mixed in with the peanut butter, you can pour it onto a piece of wax paper to cool. After 10-15 minutes of cooling, roll them into balls. Or if you want the easy way out, pour the mixture into a pan to cool. Then cut them into squares.


We like to roll the balls and arrange them on a platter.


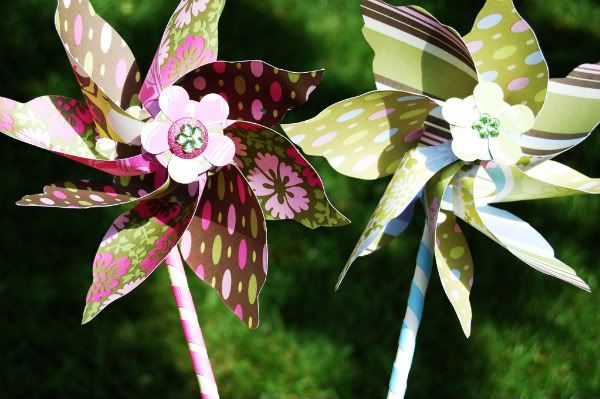
For as long as we can remember, corn flake clusters have been a delicious treat enjoyed by our entire family. They are wonderful for the holidays, teacher gifts, road trips and even the beach (one of our favorite places to eat them). If you love peanut butter, you will absolutely love this recipe.

Have fun and enjoy!


5.12.2009

How to Make a Flower Pinwheel

Pinwheel Pinwheel Spinning Around. Look At My Pinwheel and See What I found.

If you were born in the late '70's early '80's, you might remember the tune to this song from Nickelodeon on a show called "Pinwheel." It was one of our favorite shows.

We found this precious little flower pinwheel pattern on Heather Bailey's Blog. We altered her pattern a little but go to her website for exact instructions. This would be a great activity to do at a little girl's birthday party, used for decorations, a party favor, or even gifts. Almost everything used for making these came from Hobby Lobby. Here is the supply list.

2 sheets of double-sided cardstock

some scraps of cardstock for the circles and flower cut outs

buttons or any other decorative do-dad for the center

2 1/8"-3/16" eyelets (you will also need some eyelet pliers, they usually come with a hole punch attached that you will also need)

wire, 18 gauge

wood bead 1/2"-5/8" in diameter

18"wood dowel, 5/16"-3/8" in diameter (also a drill to make hole)

paint for the dowel and wooden bead

ribbon for dowel

craft glue

flower punches

1. First thing you might want to do is drill a hole in the dowel.

2. Paint both the dowel and the wooden bead so they will be dry by the time you need to work with them.
3. Print out and trace the pinwheel pattern on 2 separate pieces of your cardstock. We were excited to find Amy Butler scrapbook paper at Hobby Lobby so that's what we used.
4. Punch a hole in the center of each pinwheel and at the end of all the spokes. (there are black dots on the pattern that you cut out to show you exactly where you need to punch the holes)


5. Cut out the circle in the center of the pinwheel pattern or use a 1" circle hole punch. You will need two circles cut from the cardstock. Punch a hole at the center of one circle.


6. Place the 2 cut out pinwheels together face up to where they are locked with spokes on top.


7. Attach the eyelet at the center to hold them together. You can still adjust the pinwheels a little even with the eyelet in place. The eyelet pliers take a little getting use to, especially manuevering around the paper so that it doesn't tear. It's actually a pretty neat tool that scrapbookers use for decorations.


8. Then comes the hardest part of all. This took a little time figuring out but it did finally work. You need to bring each spoke to the center, one a time, attaching them to the other eyelet. You will need to hold them down together with your fingers and try not to let your fingers shift sideways or the eyelet will not be facing up when you attach it. Now, use your pliers to set the eyelet. This is a little difficult to do but you can do it!. Both eyelets should be centered if it's done correctly. You need them to be centered so that the wire can easily go through both holes to form a straight line.


9. By now your dowel should be dry. You can use your craft glue to attach ribbon around the dowel.


10. Take your wire and cut about a 12" piece. Bend the wire about 3/8" from the end.


11. Slide the hold-punched cirle onto the bent end of the wire. Then glue the other circle on top so that the bent end of the wire is no longer showing.

12. Cut out flowers for the center or use some flower punches that are used for scrapbooking. Glue them on top of the circle and then add your button or decorative doo-dad in the center.

13. Slide the flower pinwheel through the other end of the wire until it reaches the spindle. 14. Add the wooden bead. Slide the wire through the hole of the wooden dowel. Leave some space between the bead and dowel so that the pinwheel will have room to spin.

15. Finally, wrap the remaining wire around the top of the dowel tightly.

16. Your done!! Admire your hard work!


The winner for the Target Gift Card Giveaway is shown at the end of the previous post.


5.10.2009

Who Wants a Gift Card?

Our passions definitely run deep. Welcome to our new blog and to our new endeavor of showcasing some of our favorite crafts for your enjoyment. We may even throw in some recipes here and there. Our hope is that we can put a smile on someone else's face that enjoys the things we do, by duplicating things we have done and that they too can share with others. Making things can be fun and rewarding. Too often people say, "I just can't do that!" We show you step by step instructions so that you too can succeed. If we can do it, you can too!


We are truly honored by your presence here at our new blog. In honor of our little grand opening we would like to give something back to you! Target is one of our favorite places to shop so one person will be randomly selected to win a $20 Target Gift Card. The winner will be announced Wednesday morning. All you have to do is sign in at the comments section below and leave your email address.

If you get a chance, check at our new Etsy shop! We have adult and child size headbands like you see in the picture above! We were so excited to find out that we were featured in an Etsy Treasury and in someone's favorite list!! The pics are below.


AND THE WINNER IS......


Thank you so much to all who signed up for our first giveaway! Your kind words are so encouraging! Please check back soon for our next giveaway!!!


4.28.2009

Giveaways

February 1, 2010
Victoria's Secret Gift Card

January 4, 2009
Cracker Barrel Gift Card

October 21, 2009
Bath and Body Works Gift Card

August 2, 2009
Wal-Mart Gift Card

May 10, 2009
Target Gift Card

May 22,2009
Williams Sonoma Muffin Pan

June 16, 2009
Gap Gift Card

4.24.2009

Grab Our Button!


<a href="http://paigeandbrooke.blogspot.com/"><img src="http://farm4.static.flickr.com/3320/3471947640_6978d73236_o.png"/></a>


1. Triple click inside the box with the code (underneath the sidebar button image) so that everything in the box becomes highlighted.
2. Right click inside the box (still with everything highlighted) and then click Copy.
3. Go to the Page Elements page in the Layout section of Blogger.
4. Click the Add a Gadget link in the part of your layout that you want the sidebar button to appear.
5. Once the Add a Gadget window appear, click the blue plus sign next to the HTML/JavaScript gadget (it should be second from the top). If this gadget is not appear available, you may have to select the Basics category from the left hand side first.
6. Once the Configure HTML/JavaScript page loads, enter any title you would like in the Title field or leave it blank.
7. In the Content field, right click and click on Paste. You should now see the code inserted into the Content field.
8. Press the Save button at the bottom of the window.
9. You should now see your new gadget appear on the Page Elements page. If you wish to do so, drag your new gadget to where you want it to appear on your blog.
10. Press the Save button at the top of the page.
11. You should now see the new sidebar button on your blog!


Shop Diaper Doodles

Coming Soon!!


Shop Headbands

Coming Soon!


4.20.2009

Shop Online

Contact Us

brookebusby@comcast.net

paigebowerman@comcast.net

Terms

Please allow 2-3 days before your order is shipped.

We sincerely apologize for the inconvenience, but at this time we do not ship internationally.

We want you to LOVE your order! If there is a problem or you are not 100% satisfied, we will refund your money.

If you are interested in wholesale, please contact us at: brookebusby@comcast.net or paigebowerman@comcast.net